

Using the Template to Create an Art File
Different printing methods, garments, and printing locations have different art file sizes. This article explains how to create your art file in the appropriate size.
Note: Before we start, please know that you can email us the artwork and we can help create the item for you.
See also: Working with Canva
If you're creating vector art for 3D Puff print, see Creating Vector Art for 3D Puff with Adobe Illustrator or Canva
For example, you want to create a T-shirt with front print using Flex Digital Print method. The art file size is 11 inches wide by 16 inches tall at 300dpi (3300 pixel by 4800 pixel). Please note that the art file size for different printing techniques (like DTG) and print locations (like on short sleeves, for example) will be different.
Download the Template
You can download the template in the Add New Item page. In your NeatoPOD dashboard, click "Add New Item" and select the type of garment. Then, select Flex Digital Print as the Print Method. Make sure "Front" checkbox is ticked. You can download the template by clicking the "Template" link (see the red arrow in the image below).

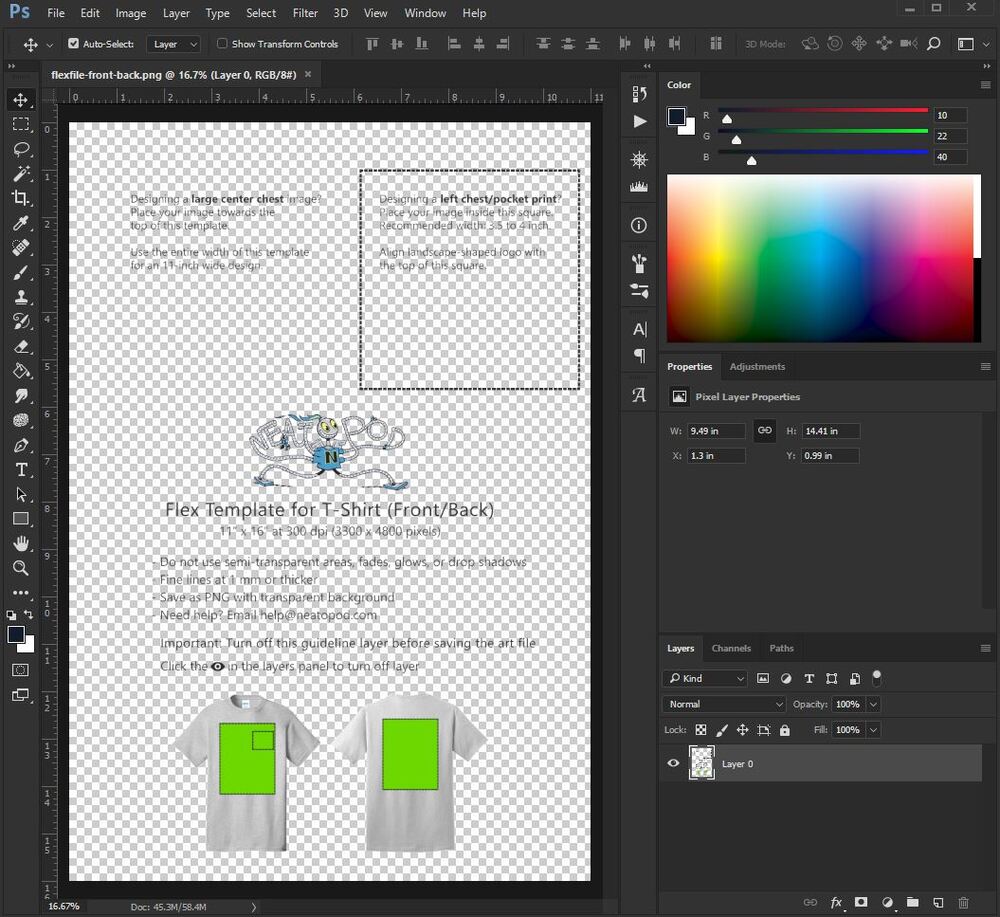
In Photoshop (or other graphic editing software), open that template. You should see the image below:
Create a new layer by clicking the Add Layer icon (see red arrow below):

This adds a layer called "Layer 1" where you can add your image. You can toggle on/off the guideline layer (called "Layer 0") by clicking the eye icon (see red box below):

Let's click the eye icon to toggle off the guideline layer. Then add (or draw) your artwork to Layer 1.
In this example, we'll add the NeatoPOD logo.
Adding a Large Center Chest Image
We'll show you two version - the first is for large center chest and the second for a left chest/pocket logo. Let's do the large center chest version first:

Here, we've added an 11-inch wide image. This image will be printed at 11 inches wide on the tee.
Save the file by clicking File > Save as. Select PNG as the file format.
Under PNG Options, select "Smallest/Slow". This will compress the art file to save space.

And you're done! You now have an art file that you can upload.
Adding a Left Chest/Pocket Print Position
Let's do a left chest/pocket print position as the second example. Here, I'll re-use the large logo and scale it down and reposition it.
First, let's toggle the guideline layer on so we can see it (see the red arrow below):

You're seeing two layers on top of each other, the logo layer on top and the guideline layer below it.
Make sure the image layer is selected (see red arrow below), then resize and reposition it by selecting Edit > Free Transform.
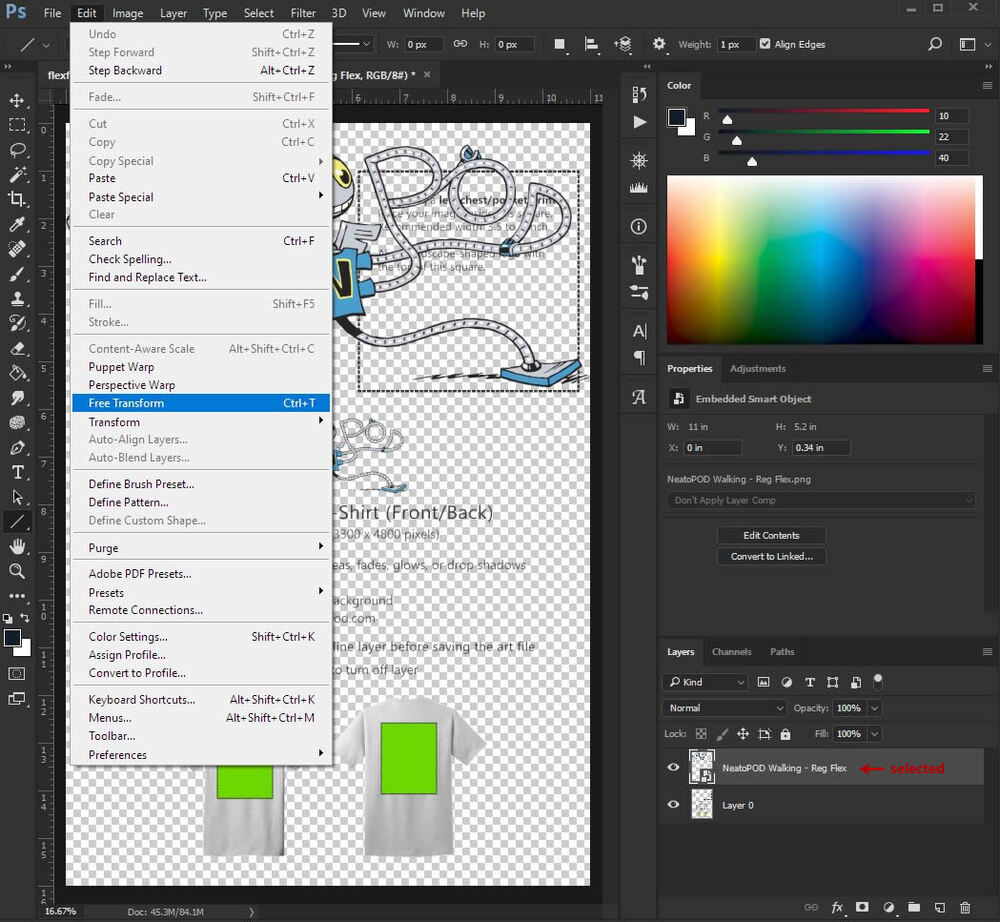
Grab one of the edges of the transform box and shrink the image and reposition it inside the square with the dotted lines.

Toggle the guideline off by clicking the eye icon next it (see red arrow below):
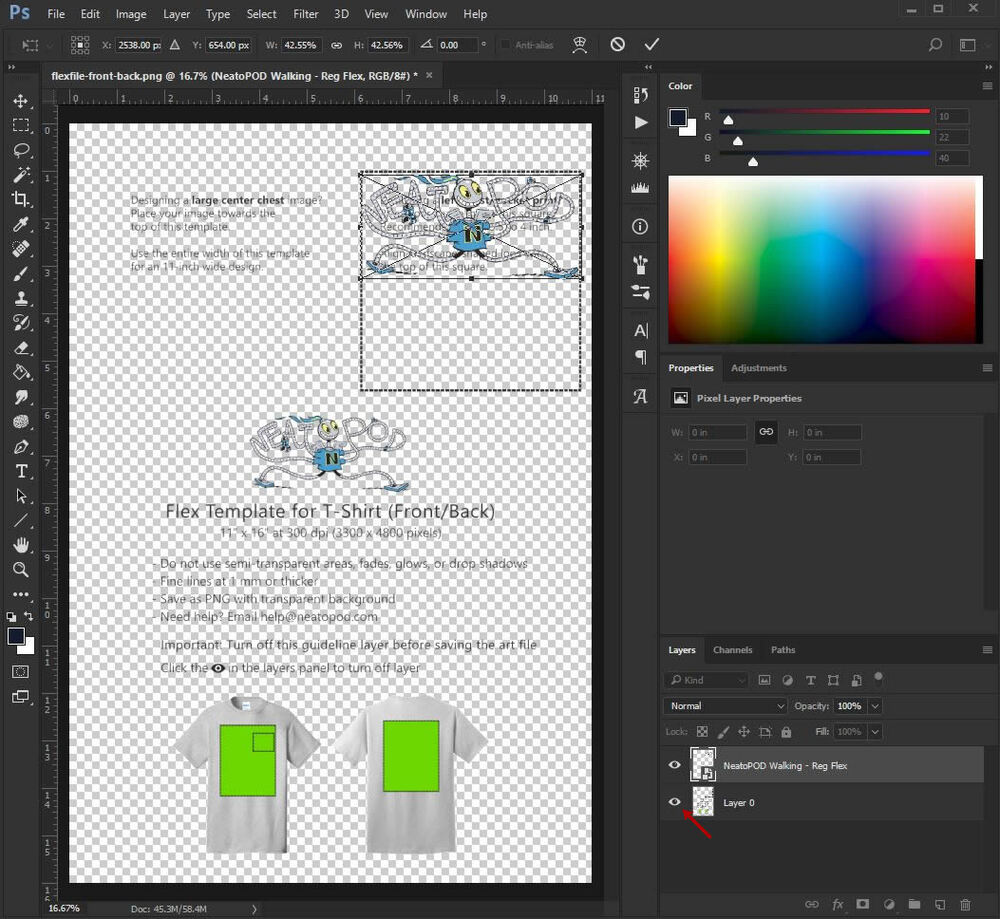
After toggling the guideline off, this is what you should see:

Notice that the image is located at where the left chest/pocket print position is located. The rest of the template is empty space.
Save the art file as PNG by clicking File > Save as and selecting PNG as the format. Compress the file by selecting "Smallest/Slow".
... and that's it! You now have an art file that you can upload.
If all this sounds complicated, don't worry - like we mentioned above, you can just email us the art file and we'll help do all this for you.
Now you're ready to place your order! See: Placing Your First Order