

Selling to International Markets
Note: We highly recommend that you sell only to domestic USA market first until you get the hang of selling on Shopify before selling internationally.
Selling internationally can be tricky: shipping cost is much higher and can be vastly different from country to country (for example, shipping a single tee with USPS First Class Mail International is about $10 to Canada, but $15 to EU, UK and Australia). Shipping transit time can be long and subject to customs clearance delays. Also, customs duties and fees are not included - your customer may be subject to these fees. Certain countries (like Israel) will require a mobile phone number.
This guide explains how to set up your Shopify to enable selling internationally:

1- Create a Market
In your Shopify dashboard's sidebar, click "Markets" then click the "Create market" button.

Let's create a market for Canada. In the New market page, enter the name "Canada" then click "Add condition".

In the market conditions pop up, search for "Canada" and click the checkbox. Click "Done"
Under the "Inherited" section, you can restrict that only certain products be sold to this market, change the taxes setting, etc. But let's leave it as the default setting.
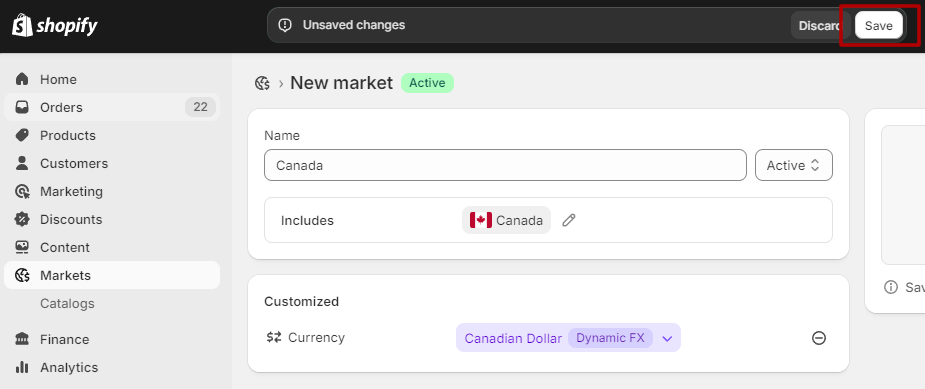
Click the "Save" button.
2- Set up the shipping rates to Canada
Next, let's set up the shipping profile to Canada.

Click the "Manage shipping" button.

Click "General shipping rates"

Click "Add shipping zone"

In the Zone name, enter "NeatoPOD Canada" and then check the checkbox next to Canada. Click "Done"

Under the NeatoPOD Canada section, click "Add rate".

In the "Add rate" pop up, select "Economy International" for the shipping rate, enter $10.00 for the price, and select "US Dollar" as the currency. Click "Done"

As always, click the "Save" button on the top bar.
That's it! You've enabled selling to Canada. Repeat the steps above to each of the country (or group of countries) that you want to sell to.
How to enable a group of countries
It can be quite tedious to set each country as its own market (even though this gives you the granular ability to set different shipping costs to each country).
Sometimes it's easier to group the countries in a particular region. Let's set up Australia and New Zealand as a market.

In Shopify dashboard sidebar, click "Markets" and click the "Create market" button.

In the "New market" pop up, enter "Australia and New Zealand" as the name, and click "Add condition".


In the Market conditions pop up, search for Australia and select that country, then click "Done".
Search for New Zealand and select that country. Then click "Done"

Your new market now includes those two countries.
Then continue the steps above to add shipping zone and rates to this market.